So some of you may notice that the name of the blog has changed. The site address is still the same because I didn't want to try and move everything over for all of you that follow this blog. I decided that this name sounded a little more sophisticated.
What do you think?

Monday, August 23, 2010

Saturday, July 31, 2010
Another One of Those Helpful Hints
So you all know how much I am in love with Arm & Hammer Baking Soda. Well, I've got another wonderful use for this great product. This one is for your bathroom.
If you've got some hardcore soap scum and have spent hours scrubbing it to no avail, you will want to pay attention. Two simple products. That's all you need.
Baking Soda and Distilled Vinegar!

I know you all probably think this sounds like you are performing old school science experiments in your bath tub but it works.
I tried it a couple of different ways and the best way I have found is to sprinkle the baking soda where your soap scum is and them sprinkle the vinegar over the baking soda. If you use the vinegar first and then sprinkle the vinegar you will lose more than half of the vinegar to your tub drain.
I also noticed that your hands really don't smell like vinegar for very long, and the smell doesn't linger in the tub either. The nice thing about this is it is also great for the environment and for YOU because you are using products you cook with and not harsh chemicals. I don't think the tub has been this clean since it was installed.
Thanks for the tip Aunt Chris.
If you've got some hardcore soap scum and have spent hours scrubbing it to no avail, you will want to pay attention. Two simple products. That's all you need.
Baking Soda and Distilled Vinegar!

I know you all probably think this sounds like you are performing old school science experiments in your bath tub but it works.
I tried it a couple of different ways and the best way I have found is to sprinkle the baking soda where your soap scum is and them sprinkle the vinegar over the baking soda. If you use the vinegar first and then sprinkle the vinegar you will lose more than half of the vinegar to your tub drain.
I also noticed that your hands really don't smell like vinegar for very long, and the smell doesn't linger in the tub either. The nice thing about this is it is also great for the environment and for YOU because you are using products you cook with and not harsh chemicals. I don't think the tub has been this clean since it was installed.
Thanks for the tip Aunt Chris.
Wednesday, July 14, 2010
Angela's Bridals

My beautiful cousin Angela is getting married the end of this month and she asked me to do her bridals last week. I was so excited how they turned out. Thanks for letting me to this Ange.


Friday, July 9, 2010
Quick and Inexpensive!! --organizing tutorial
So, my craft room was in dire need of a SERIOUS re-organize. It was so bad I couldn't even stand to work in there. The hubby was getting frustrated too, because then I would move my projects onto our kitchen table, and he was like "don't you have a whole ROOM to craft in, or should I turn it in to something else?" Yeah, it was that bad. I thought about taking a picture of the mess it looked like before, but then thought that if any of you are perfectionist, you might not speak to me again. :D
First, I started by scoring this book case from my husband's grandpa who was moving back up to Idaho. I think that wood furniture looks so much better than plastic bins (not to mention sturdier). You can see the plastic bin next to this one, but I am trying to rectify this as soon as possible. You can usually find inexpensive bookshelves at Wal-mart, or to be a little cheaper, you can try thrift stores like Deseret Industries or Savers. Like I said, this one was totally free (for me).
 Next, you will need:

I cut the paper into strips of approximately 2-3" strips depending on the size of the jar, and wrote in black marker what it was I was putting in the jar.
 On all of the strips I inked the edges just slightly to make the words stick out. (Didn't my 8 year old neice Regan do such a good job of taking this picture?)
Then, you will need to take two pieces of packaging tape, one on each end, and tape it to the jar.
About 2/3 of the way through I realized I was not going to have enough jars, so I decided to make a couple of my own that I knew would be really simple.
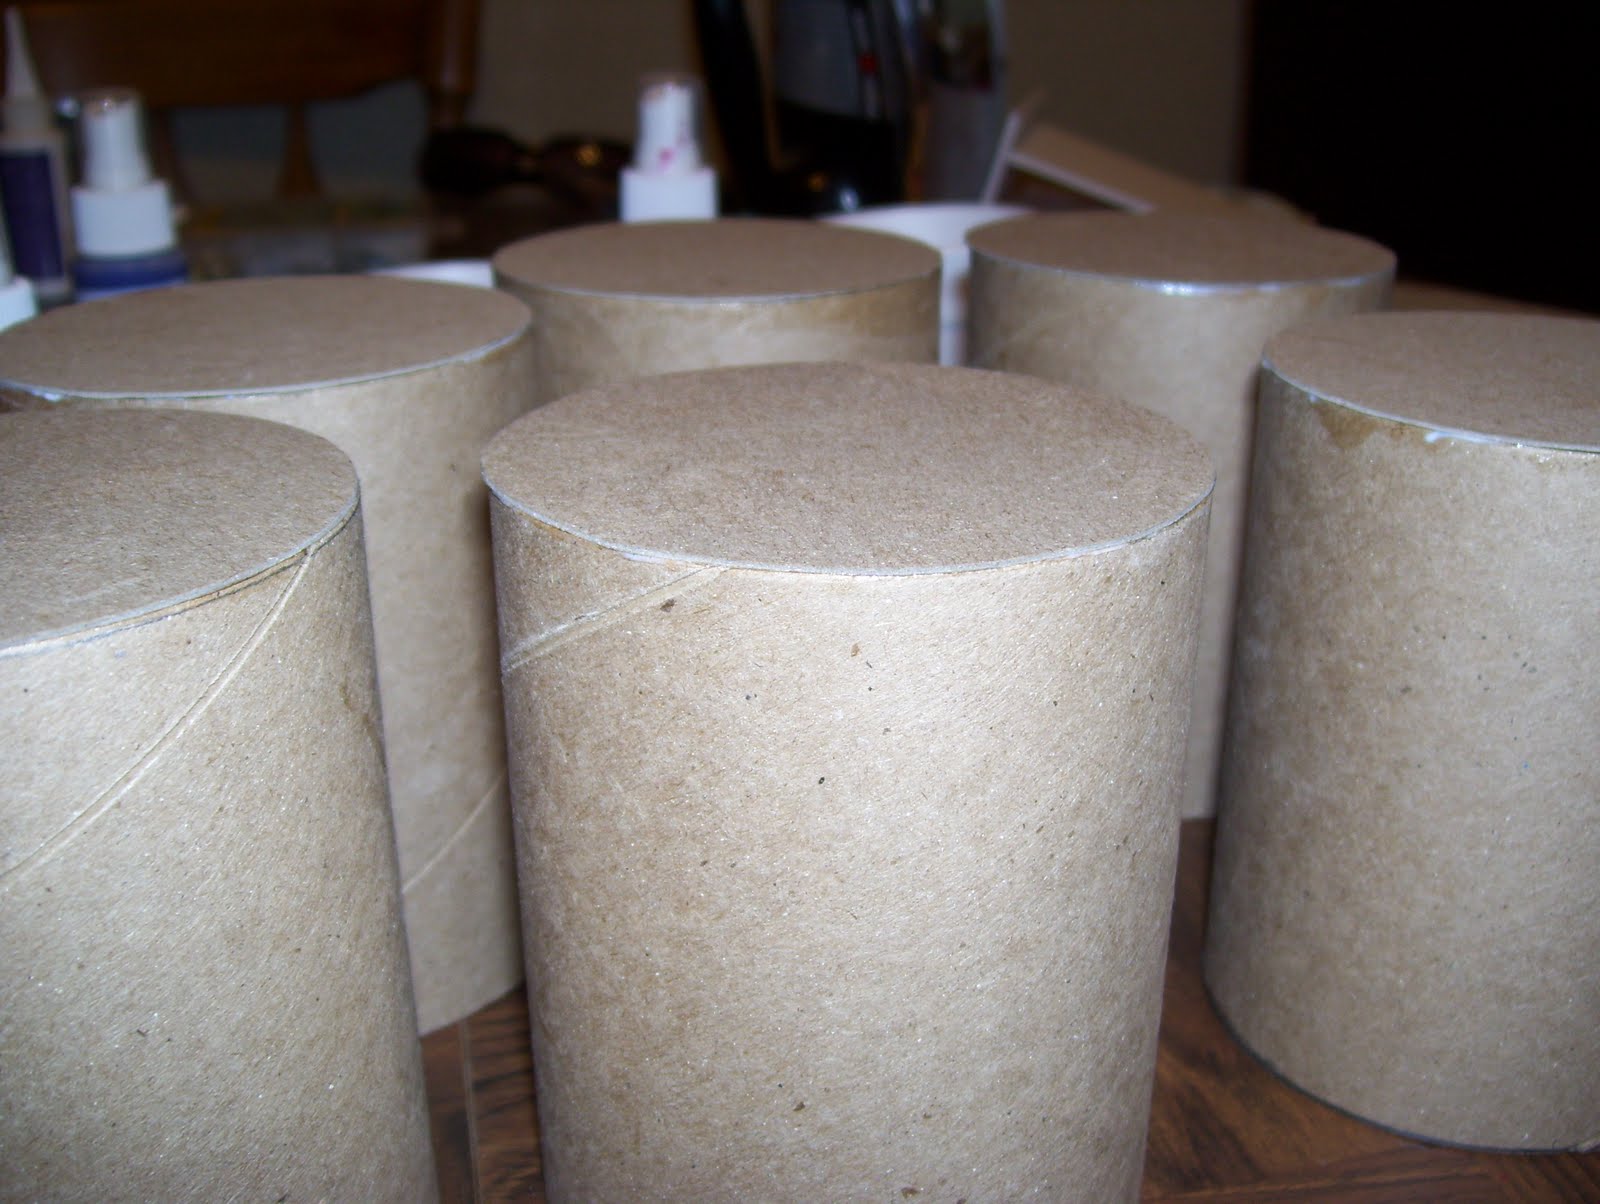
You need the inside cardboard piece of a roll of labels or vinyl, etc. These ones are about four inches tall and the cardboard piece from an paper pad.

Next, you will want to place the cardboard roll on the paper pad and trace around it with a pencil getting as close to the sides of the card board roll as possible.

Cut out the circle and use Mod Podge, glue dots, or Elmer's glue and go along the rim of the cardboard roll. Place the circle on top make sure that it lines up with the card board roll. If you used a wet adhesive allow to dry for about 15 minutes.

See, quick and simple. I put together 6 of them in less than 10 minutes. If you use a letter size paper pad (8 1/2 x11") you can cut out 6 circles from one piece of card board.


Finally, everything in it's place.

I loved how using the different kinds of storage and jars gave the shelf some dimension to it. As you can see I used a big can that held Potato Gems (not mine, but Spencer's. As an Idaho Girl you will never catch me purposefully using fake potatoes in any of my cooking) and a Swiss Miss can. But like I said. Keep it inexpensive and save things you would normally throw away.
The different kinds of glass jars I used were:
Peanut Butter
Pickles
White Alfredo Sauce
Salsa
Calypso Lemonade
Cheese Sauce
Broth
And then of course the 3 card board ones.
Other storage used in the shelf was:
The plastic bins I got from the Dollar Store as well as the small laundry basket which works well for ribbons because you can slip the ribbon through the holes in the basket.
So, get to saving your jars.
What have you organized with food jars you've kept around?
First, I started by scoring this book case from my husband's grandpa who was moving back up to Idaho. I think that wood furniture looks so much better than plastic bins (not to mention sturdier). You can see the plastic bin next to this one, but I am trying to rectify this as soon as possible. You can usually find inexpensive bookshelves at Wal-mart, or to be a little cheaper, you can try thrift stores like Deseret Industries or Savers. Like I said, this one was totally free (for me).
 Next, you will need:
- Paper-- I prefer the reams of cardstock you can get in the office section at Wal-Mart. It's a little sturdier than just regular printer paper and doesn't cost that much more.
- Glass jars- enough for all the "little" things.
- Something to cut the paper into long strips. I L-O-V-E my paper cutter although I covet one that is bigger.
- Black Marker
- Inks

I cut the paper into strips of approximately 2-3" strips depending on the size of the jar, and wrote in black marker what it was I was putting in the jar.
 On all of the strips I inked the edges just slightly to make the words stick out. (Didn't my 8 year old neice Regan do such a good job of taking this picture?)
Then, you will need to take two pieces of packaging tape, one on each end, and tape it to the jar.
About 2/3 of the way through I realized I was not going to have enough jars, so I decided to make a couple of my own that I knew would be really simple.
You need the inside cardboard piece of a roll of labels or vinyl, etc. These ones are about four inches tall and the cardboard piece from an paper pad.

Next, you will want to place the cardboard roll on the paper pad and trace around it with a pencil getting as close to the sides of the card board roll as possible.

Cut out the circle and use Mod Podge, glue dots, or Elmer's glue and go along the rim of the cardboard roll. Place the circle on top make sure that it lines up with the card board roll. If you used a wet adhesive allow to dry for about 15 minutes.

See, quick and simple. I put together 6 of them in less than 10 minutes. If you use a letter size paper pad (8 1/2 x11") you can cut out 6 circles from one piece of card board.

Finally, everything in it's place.

I loved how using the different kinds of storage and jars gave the shelf some dimension to it. As you can see I used a big can that held Potato Gems (not mine, but Spencer's. As an Idaho Girl you will never catch me purposefully using fake potatoes in any of my cooking) and a Swiss Miss can. But like I said. Keep it inexpensive and save things you would normally throw away.
The different kinds of glass jars I used were:
Peanut Butter
Pickles
White Alfredo Sauce
Salsa
Calypso Lemonade
Cheese Sauce
Broth
And then of course the 3 card board ones.
Other storage used in the shelf was:
The plastic bins I got from the Dollar Store as well as the small laundry basket which works well for ribbons because you can slip the ribbon through the holes in the basket.
So, get to saving your jars.
What have you organized with food jars you've kept around?
Monday, June 14, 2010
So I got an email from someone named Matt last week and accidentally deleted the email. If you're still out there Matt please email me again.
Thanks!
On a side note be sure to pop over to Thinking About Pretty. It is a blog of a good friend I used to work with before I was a SAHW. She is so sweet. I miss working with her.
Thanks!
On a side note be sure to pop over to Thinking About Pretty. It is a blog of a good friend I used to work with before I was a SAHW. She is so sweet. I miss working with her.
Monday, June 7, 2010
Today's Helpful Hint
So I was doing pans today and remembered a little blurp I had seen on the side of a box of baking soda i just bought last week about being a scratch free scrubber. I tried it out today and it was AMAZING!!! The little soda crystals worked out this nasty stuff that has been stuck to my pan for months. Before this all my scrubbing was for naught. When I cooked before with this pan I had to always lay aluminum foil in the pan because I could never get this nasty stuff OFF. Well, today I did it!! It's my new favorite thing. Once it worked on the pan I had to try it in my bath tub. It worked pretty well, and I was amazed at the soap scum it got rid of without too much scrubbing. I am hooked now. And for the 8oz box it was only.. are you ready for this?
And it is odorless, so no harsh fumes, and your hands don't feel gritty at all after cleaning with it the way they always did with other powder cleaners like Ajax or Comet. Who knew?

46 CENTS!!
And it is odorless, so no harsh fumes, and your hands don't feel gritty at all after cleaning with it the way they always did with other powder cleaners like Ajax or Comet. Who knew?

Way to go Arm & Hammer!!
Friday, June 4, 2010
Updates
In the post below this one the very last picture is of a car seat canopy I did for my cousin. That sweet girl sent me some pics of it on the actual car seat it was made for.
And starting today, I am a full time stay at home wife. (No kids yet). So hopefully some of the free time that has opened up will allow me to get more projects done and to bring you guys and gals some tutorials that have been piling up in my head.
And I'm starting crochet lessons next week with a dear friend of mine so I will keep you all posted on how that's turning out. My grandmother tried to teach me in high school, but the lessons stopped after the granny square I was working on turned out to be a "wreck" tangle.


And starting today, I am a full time stay at home wife. (No kids yet). So hopefully some of the free time that has opened up will allow me to get more projects done and to bring you guys and gals some tutorials that have been piling up in my head.
And I'm starting crochet lessons next week with a dear friend of mine so I will keep you all posted on how that's turning out. My grandmother tried to teach me in high school, but the lessons stopped after the granny square I was working on turned out to be a "wreck" tangle.


Subscribe to:
Posts (Atom)